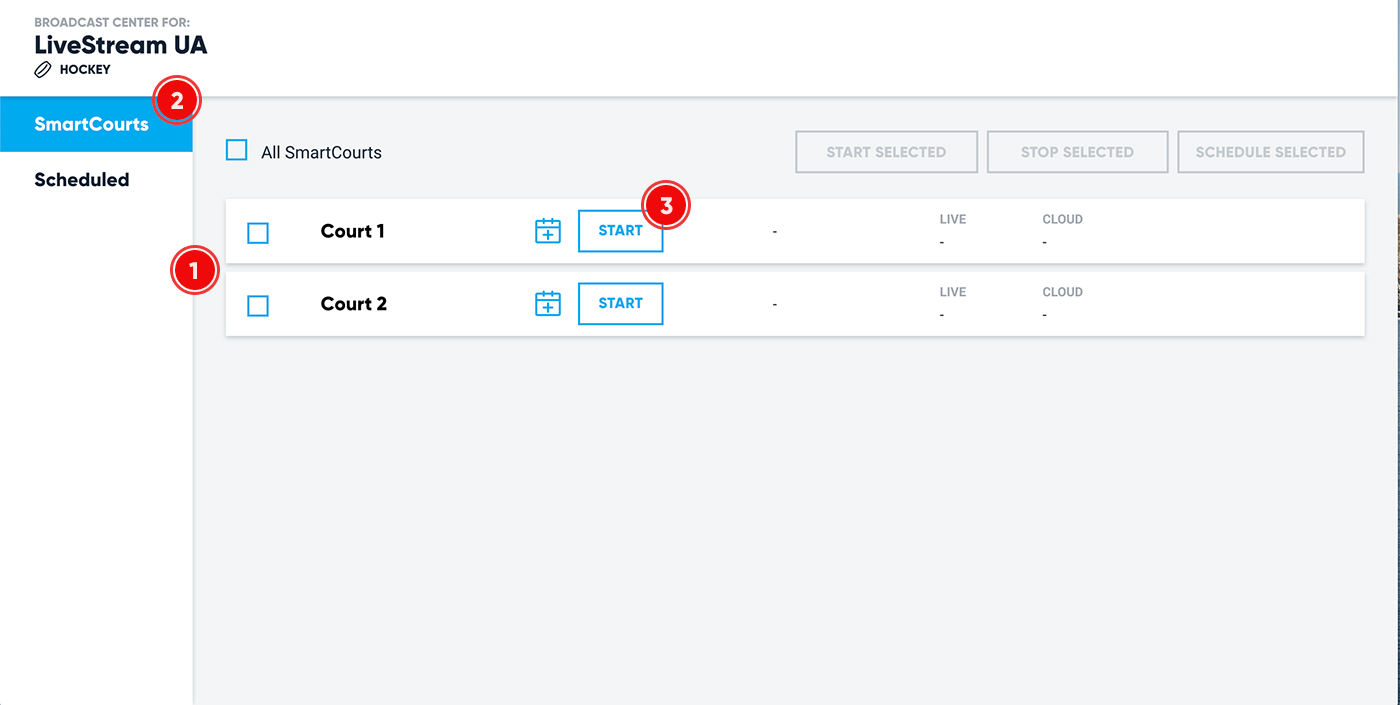
Session settings
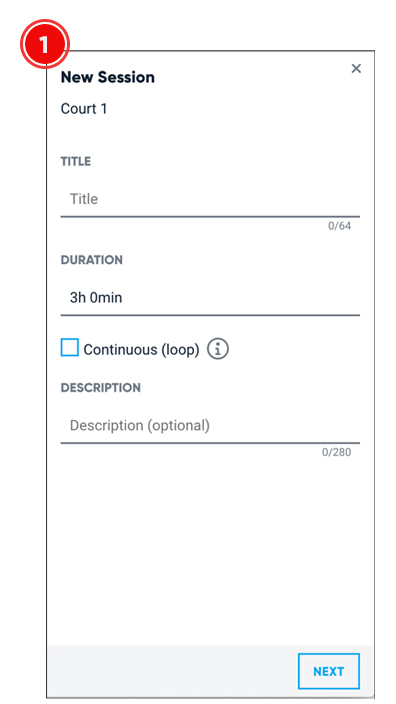
STEP 1:
Title: This optional field will be the name of your session. You can leave this blank for a default session name or name it yourself.
Duration: Select the duration of your session. When the session reaches its duration, the recording / stream will stop.
Continuous (loop): If you wish to record consecutive sessions or you need a recording which is longer than the max duration allowed, you can tick this box. This will start a new session right after the first recording ends. This loop will continue all day long. This option will create individual sessions with the same setting on the scheduled session list. You can modify or remove each one of those sessions individually.
Read more about continuous sessions here
Description: This optional field allows you to add a note or a description that will appear on your session summary info.
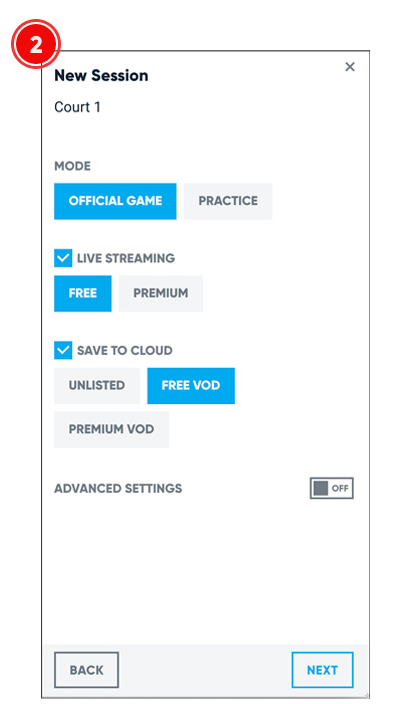
STEP 2:
Mode: Select the right mode of your session. This will help you to filter recording types in your activities feed.
Live streaming: If you want to live stream your session, tick the box next to LIVE STREAMING option. If your SmartCourt is connected to our monetization platform, you will have the option to select between FREE live streaming and PREMIUM.
Save to cloud: If you want to save your recording and upload it to the cloud, tick the box next to SAVE TO CLOUD option. If your SmartCourt is connected to PlaySight’s monetization platform, You will have the option to select between FREE, PREMIUM and UNLISTED – the FREE option will upload the video to the on demand platform and allows users to add this content to their account for free. PREMIUM option will allow users to purchase the content and add it to their account. UNLISTED option will record the content to your account only and it will not be available on the on demand platform.
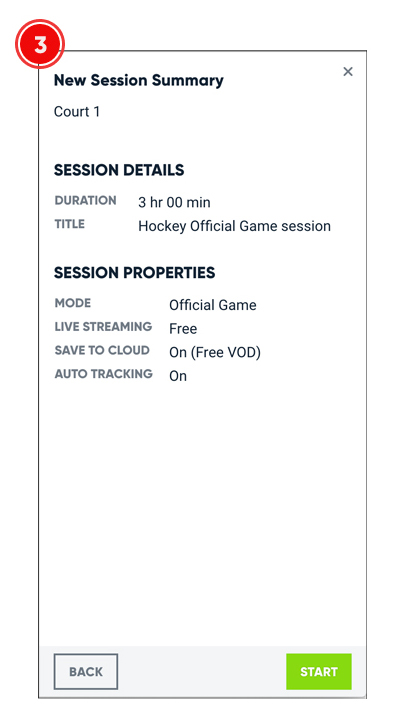
STEP 3:
Review your settings and click START if you are ready (or go back to make any necessary changes).
Schedule a new session
You can schedule multiple sessions on multiple courts by ticking the boxes on the courts list and clicking on the SCHEDULE SELECTED button above the courts list.
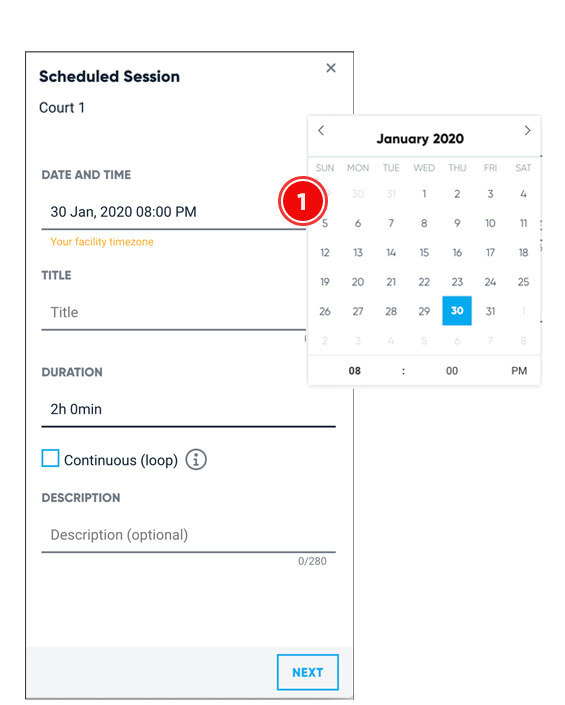
STEP 1
Date: Select the date and the start time of your session.
Title, duration and description as described above in the session settings section.
STEP 2
Select session type and streaming / recording modes as described above in the session settings section.
STEP 3
Review your scheduled session summary and save or modify as required.
Scheduled sessions list
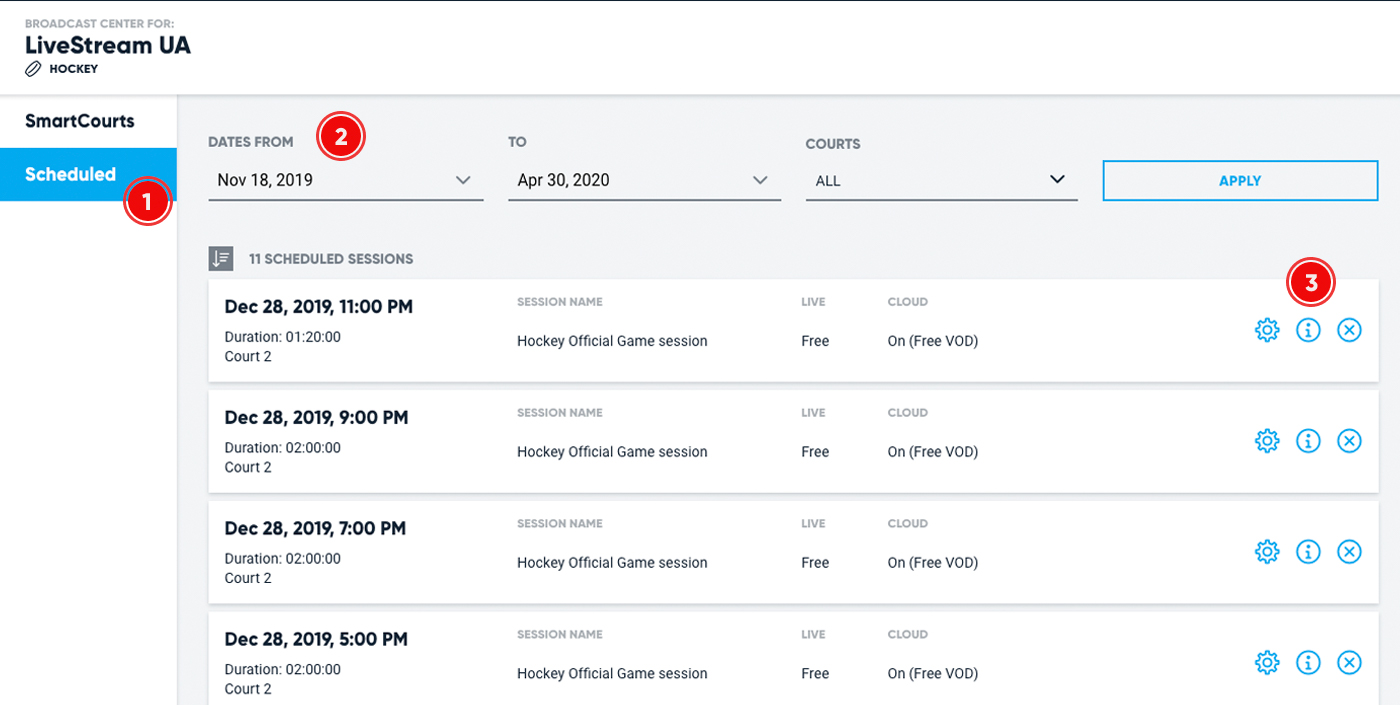
You can filter the list by date range and by courts (2).
Use the editing tools to modify or remove your session.
Edit session settings
Session summary info
Delete session
Continuous session (loop)
When setting up a new session you can select the continuous option if you wish to record / stream more than one session. This may assist you in managing a tournament day with multiple games or any day long activity.
When selecting this option, all sessions within the loop will appear on the scheduled sessions list (except from a currently running session if there is one). From the scheduled sessions list you can modify each one of the sessions individually – including duration or to rename or remove unnecessary slots.


